

Genuine Franke Triflow Stainless Steel Housing
FRANKE TRIFLOW REPLACEMENT FILTER HOUSING - FITTING OPTION 1
GENUINE ORIGINAL MANUFACTURERS BRANDED PRODUCT
This listing is for a Genuine Franke/Triflow Concepts Stainless Steel Filter Housing, it is the current version as supplied by the Manufacturers.
Franke Filter Housing
PLEASE NOTE: This is NOT a Low Cost immitation compatible product, it is a genuine and Original FRANKE TRIFLOW branded product.
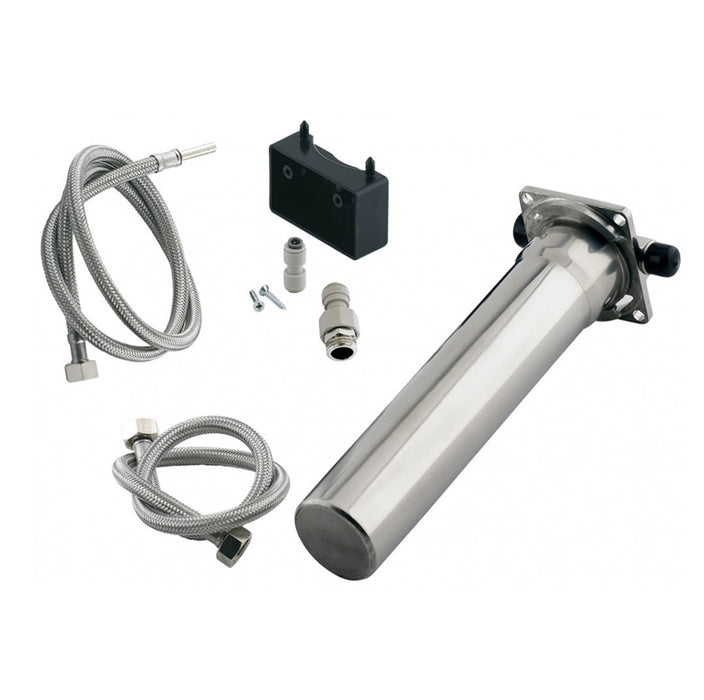
Included is the Wall Bracket, Braided hoses and Push fit fittings for easy replacement – Fitting Instructions are shown below.
This product WILL REPLACE ALL of the version 1 Housings (very early models) and the more common version 2 Housing (White Plastic with Black Top), the most common versions sold.
This product DOES NOT come complete with a Filter Cartridge, however these can be found also on this site.
Option 1 - Fitting Instructions using the New Stainless Steel Braided Hoses.
1 - Turn off the Isolating Valve 90 degrees from horizontal, this is usually a Blue handled tap as supplied originally with the Triflow system.
2 - Turn on the filter tap/faucet to reduce pressure in the housing and to make sure that the water supply is off.
3 - Place a towel in the bottom of the base unit to soak up any residue of water.
4 - Undo and remove the push fit fitting as fitted to the stop tap.
5 - If a pressure reducing valve has been fitted after or on to the stop tap, remove this also.
6 - Cut the green pipe at a convenient position under the tap. (don't cut too near the tap)
7 - Lift off the white plastic housing from the black wall bracket together with the blue and green pipes.
8 - Undo the 2 screws and remove the bracket from the cabinet/wall.
9 - Fit the new black plastic wall bracket on to the cabinet/wall using the existing screws & holes.
10 - Make sure the new inlet hose will reach from the stop tap to the new bracket, if not re-position the bracket closer.
11 - Assemble the stainless steel hoses on the appropriate sides of the housing.
12 - Undo by a 1/4 turn Anti clockwise, the base from the top of the new Stainless housing.
13 - Carefully fit a new cartridge into the housing top and replace the base 1/4 turn clockwise.
14 - Lift the housing, complete with pipes onto the bracket.
15 - Connect the inlet hose onto the stop tap, don’t over tighten.
16 - Push the 1/4” x 1/4” straight connector onto the remaining green pipe under the tap.
17 - Push the 1/4” metal end of the outlet pipe from the housing into the straight connector.
18 - Having left the filter tap on, turn on the water at the Isolating Valve and let the new housing fill up slowly.
19 - When the water starts to come through the filter tap turn it off and check for leaks.
20 - Turn on the filter tap again and run the water for 2 minutes or until the water runs clear into a glass.
21 - Re-check all joints for leaks - Job Done